How I Organize My Instagram Feed

For three years and counting, I felt that I have always struggled with finding a consistent theme (color scheme, location choice, order of angles/poses, etc.) when it came to analyzing my overall Instagram feed. Although my brand, Missmisschelle, is all about spreading positivity and words of encouragement, I felt that I just couldn't communicate the aim of my blog as strongly as I wanted to through a messy assortment of tiny little squares that make up the Instagram app that we known and love. Even if I included smiley photos and inspirational quotes, I still felt that my entire feed was visually messy, random, and chaotic.
But after three years of hard work, understanding, observation, and experimentation, I can finally say that I am truly happy that I have found my niche - in other words, a consistent theme that matches my personality and visual preferences. Y'all might think I might sound crazy and obsessive, but trust me when I say that almost every individual (unless you're already a famous celebrity) who pursues Instagram from a professional standpoint NEEDS to have an aesthetic feed in order to attract a target audience. So with this blog post, I have compiled tips and tricks that I utilize for MY Instagram feed and hope that these general pointers can help you out as well! Please note that my advice does not apply to EVERYBODY'S feed, but were created to help the average person out.

Photography By: Sharon Litz (@sharonlitz)
www.sharinaone.com

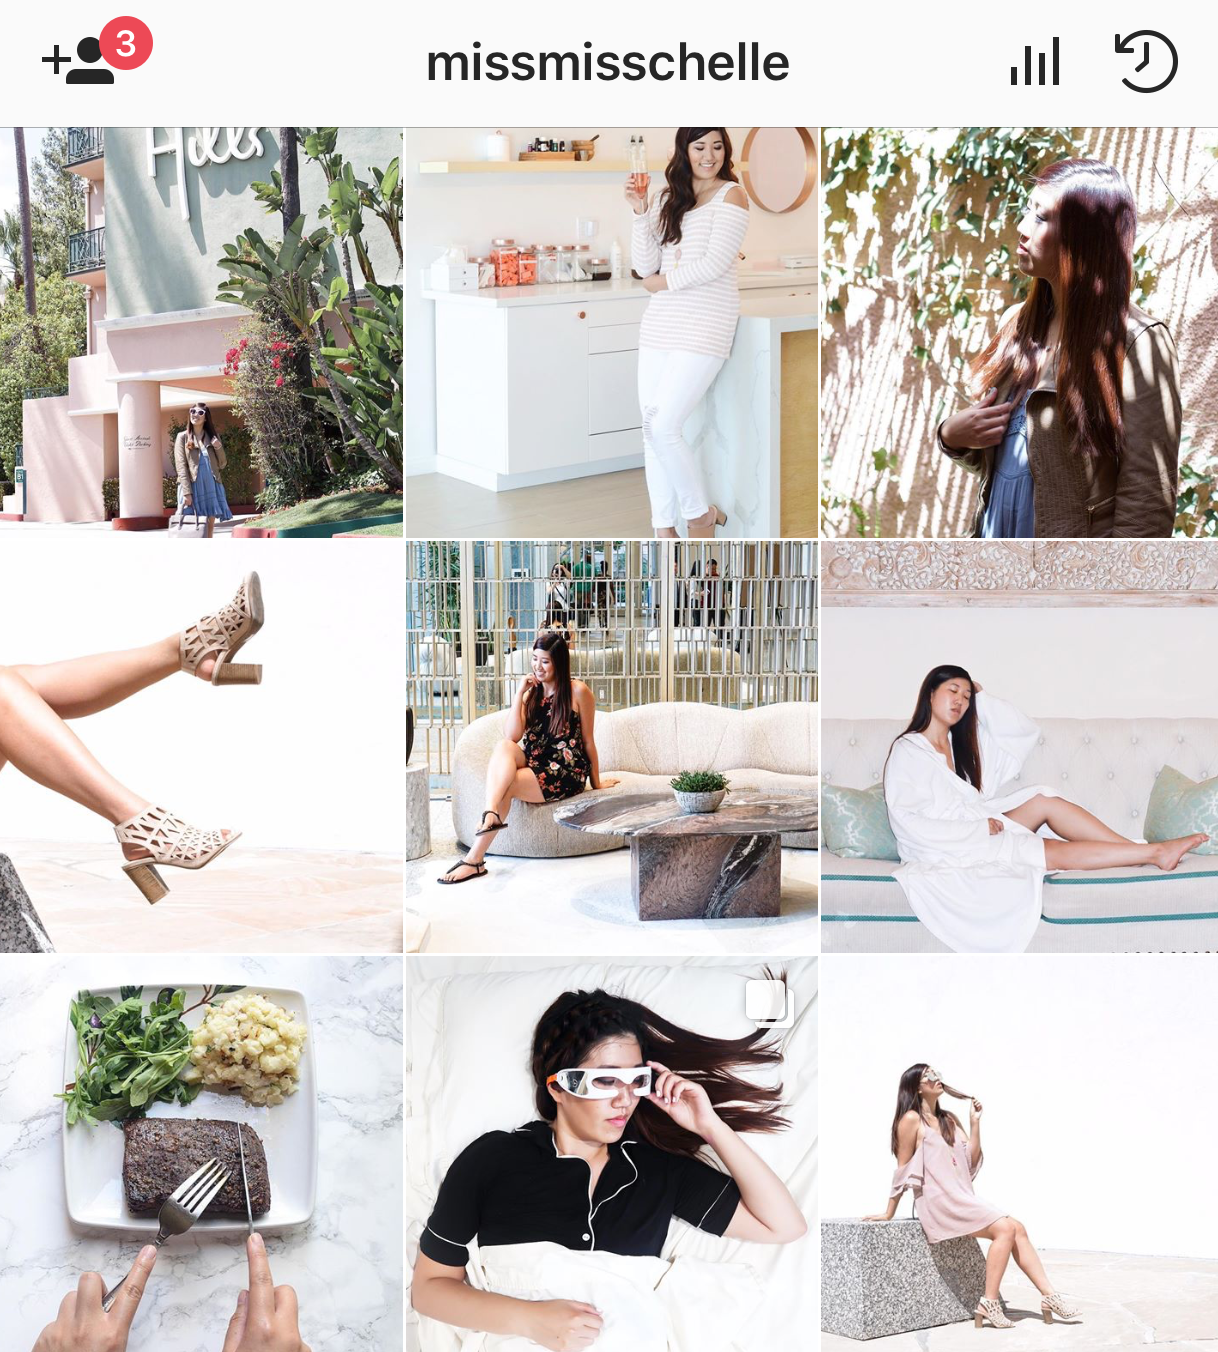
My current Instagram feed as of Sunday, September 10, 2017.
Tip #1: Filler photos create a balanced Instagram feed.
Tip #2: Organize your Instagram feed with ease with the mobile app, Preview.Filler photos can be defined as images that help space out the more important photos on your feed. In other words, these types of photos help your entire feed achieve balance and provide a smooth transition from one photo to the next. A filler photo can consist of a simple product photography shot, building/architecture/city shot, a bouquet of flowers, etc. - basically, any photo that doesn't typically have significant meaning. Filler photos should be integrated into one's feed whenever necessary, anywhere from every other photo to every 3-5 photos. In fact, the best way to know where a filler photo should be placed is based on trial and error. Individuals outside of the Instagram world don't know this, but social media influencers take anywhere from 10 minutes to over an hour just organizing their feed for the next few days worth of content depending on the aesthetics and preferences of their page. When Instagram is a part of your profession, the work behind content creation and social media management is much harder than it looks.
Tip #2: Organize your Instagram feed with ease with the mobile app, Preview.
How do people create such visually aesthetic feeds? Do they just have the keen eye for organization, or are they using a helpful tool to achieve such a feat? Maybe a little bit of both.
While a lot of my blogger friends have made a "secret" private Instagram account just for organizing their feeds, I personally hated that method just because you have to go through the repetitive and tedious process of uploading and deleting multiple photos if one photo didn't look right.
But if you're reading this, now you don't have to make another Instagram account! Lo and behold, I want to introduce you guys to a FREE mobile app that you can download from the "App Store" called Preview, which allows you to conveniently organize your Instagram feed however you want it to look before your posts go live. This app is literally a lifesaver and has made my Instagram life a whole lot more stress-free since I can visually see which photos look good together side-by-side. I've been using Preview for the last three months and am truly a happy camper.
Tip #3: Mix minimal and busy photos together to create a more interesting feed.
Now this is a tricky tip that may take months of practice to succeed - even I'm still trying to get the hang of it! So there are three types of feeds that people have - minimal, busy, and a mixture of both. For Missmisschelle, I prefer a mixture of both minimal and busy photos with a touch of lifestyle and travel so that I can take my audience on a visual and unpredictable adventure.
The reason why I love playing around with different types of images is because it creates interest and spark, and nothing is ever too predictable. I personally feel that minimal feeds make it too easy to guess what the next uploaded photo will be, and a gallery of busy photos can become too crazy for the eyes. To each their own, but to me, it's all about balance.
Example of a minimal photo: A bird's eye view of a latte cup underneath a white table.
Example of a busy photo: Standing in front of a forest of redwood trees.
Tip #4: Identify your favorite 3-5 colors, and try your best to stick to them.
Unless you have a wildly colorful feed (and that's your theme), it's best to stick with a few of your favorite colors when organizing your entire feed. When you consistently organize photos with a similar color scheme, it makes the entire organization process a lot easier than trying to make 10 images flow back-to-back with no matching colors in sight.
For Missmisschelle, it took me three years to finally realize that I love a light, airy, and pastel type of feed. Thus, I learned that I typically gravitate towards white, light blue, pink, and a desaturated green (which I take care of on Lightroom). However, the colors that I do my best to avoid include red, orange, yellow, purple, and brown.
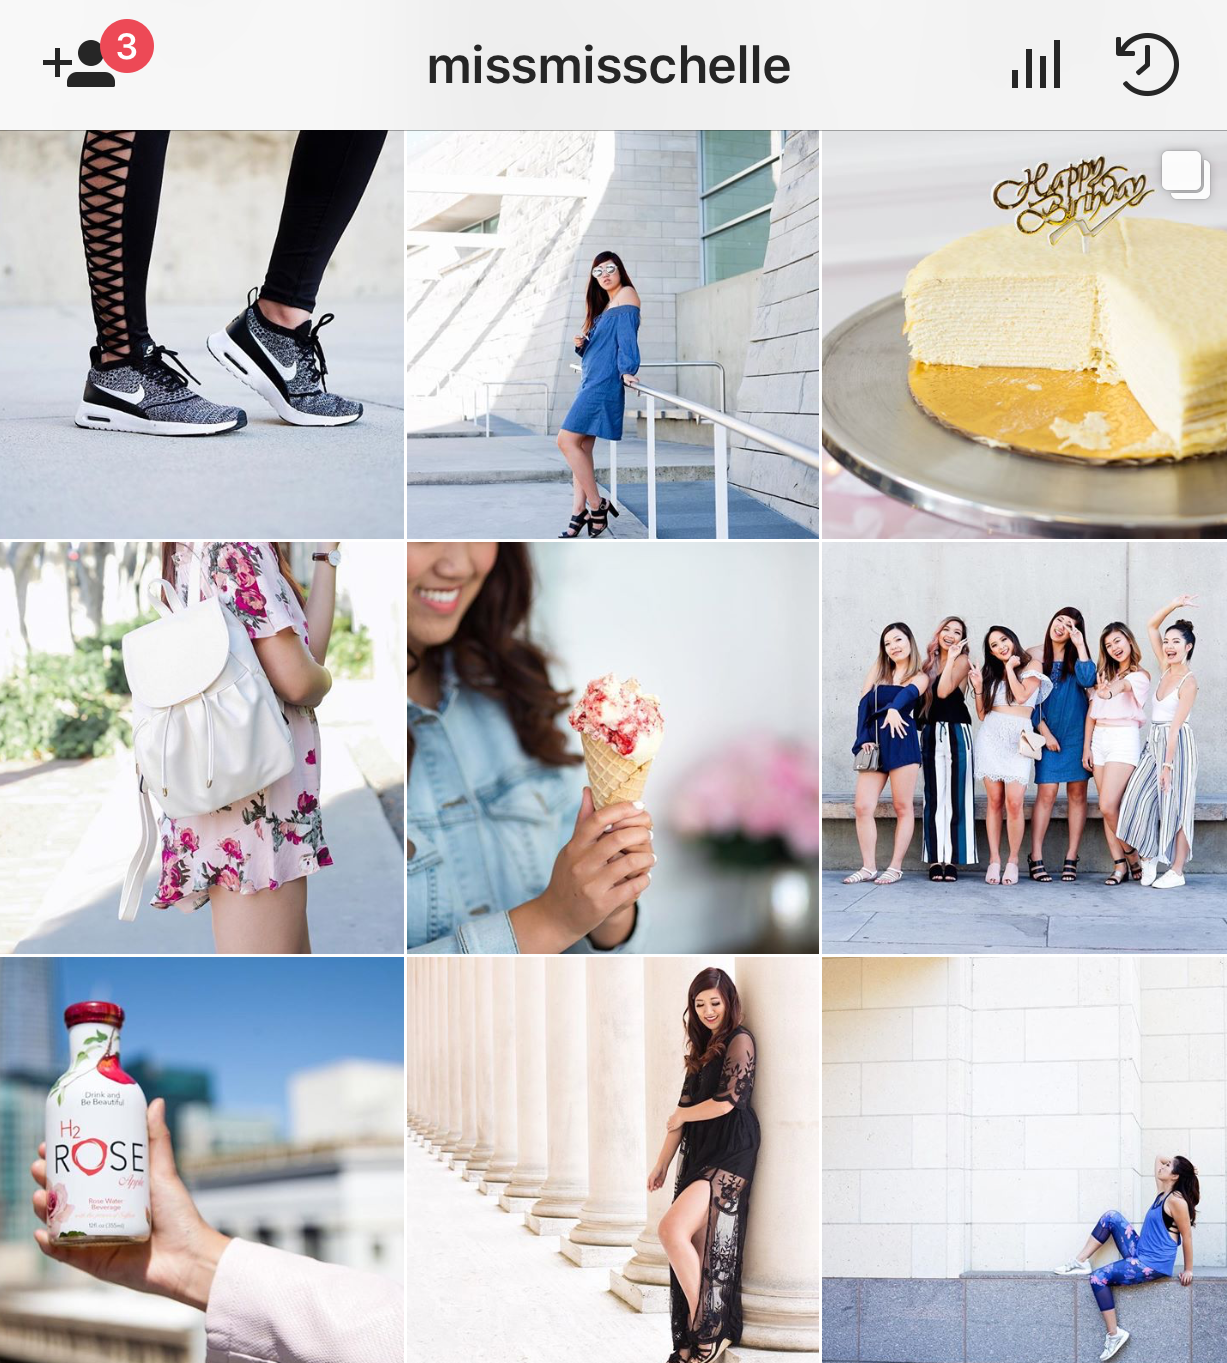
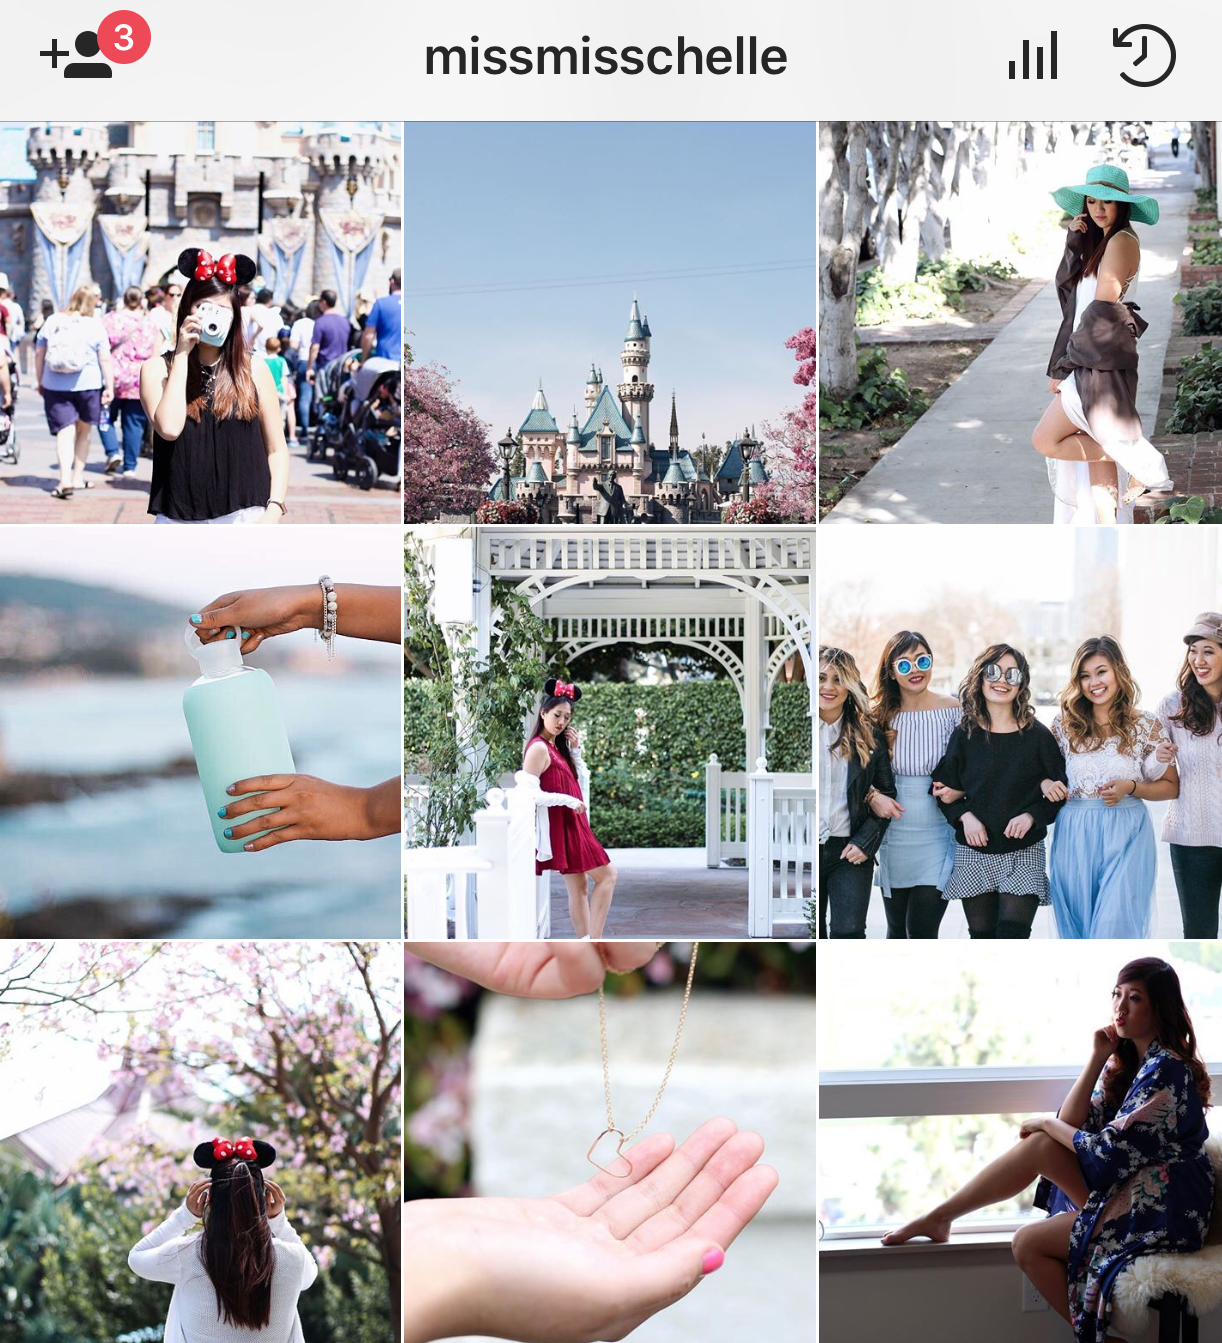
See a few examples below where I bring out the pastel colors on my Instagram feed. These are the top three screenshots where I absolutely LOVED my feed - it also helped that I was traveling a lot, so shooting at different locations always spices things up!
Tip #5: Change up the angles, change up the poses!
This tip is more of a personal preference, but I feel that it really helps any influencer who yearns to create a lifestyle or travel type of feed. There was a point in time when I was posting only full-body or half-body looks and grew terribly bored of my feed. I felt that it was predictable and dull to look through all of my photos, and that's when I realized that I needed to change things up a bit. Thus, I researched and studied the feed of my favorite bloggers for inspirational content. When I compared my feed to that of my role models, that's when I knew what I was missing on my own feed.
Because I emphasize lifestyle, travel, and inspirational content on Missmisschelle more than fashion, I strongly feel that I need to integrate different angles on my feed to communicate a certain message to my audience. For Missmisschelle, I feel that the location, pose, and angle of the shot help bring emphasis to my inspirational captions, while my outfit counts as a bonus or complement to the positive message that I'm trying to convey. For solely fashion feeds, it makes sense to have more full-body, half-body, and detailed shots because you're showcasing the outfit itself and not necessarily the caption.
If you're looking for inspiration when it comes to creating content, I've listed a few of my favorite fashion, lifestyle, and travel blogger feeds for you to draw inspiration from as well.
Lifestyle/Travel Bloggers:
TheGreyLayers
ByLisaLinh
DreaChong
BellyWellyJelly
HelenChikx
Kryzzzie
ItsCamilleCo
Fashion Bloggers:
NotJessFashion
MargoAndMe
JennIm
JenniferHenryNovich
RunwayOnTheGo
Cuppajyo
TheCityBlonde

If any of these tips have helped you out, I'd love it if you could leave a comment below sharing with me which tip resonated with you most! :) Thanks, and I'll talk to you guys soon! Don't forget to follow me on Instagram and Instastories for daily updates and adventures :)
Much Love,